Follow this blog

Software engineering, design, and psychology

Later Ctrl + ↑

Enforce Any Code Style Constraint with ESLint
When managing big software projects, it is important to configure code rules for loads of scenarios. Usually, you start with basics, like prohibiting unused variables, requiring super() calls in subclass constructors, or catching duplicate conditions in if-else blocks.

In JavaScript / TypeScript projects that is handled by standard ESLint plugins: @eslint/js, typescript-eslint, eslint-plugin-react, etc. They are more or less easy to configure (ignoring the new flat config which adds the fun of guessing which plugins support it and which don’t yet), and this is where most tech leads stop.

However, the bigger the project, the more dependencies and opinionated patterns of doing something it accumulates. Large packages may have separate ESLint plugins maintained by independent contributors, but sometimes you’ll want to enforce a rule that doesn’t exist in any plugin. This becomes very important when you expect many people to work on the project, or if you want to use AI agents to write acceptable production code without thorough manual review.

The good news: ESLint lets you create almost any rule you can imagine! You don’t need to know specifics of ESLint scripting, since ChatGPT successfully manages to write 95% of the logic, and the remaining 5% would be easy finish when you see selector structure and regex patterns.

Here, I want to share a specific example. On my current frontend project we use Typescript, React, and Next.js with zustand for client-side state storage. To persist state after a page reload, I added the persist plugin that writes and reads data from browser’s localStorage. The problem is, Next.js renders client-side components twice: first time on server, then in browser, and both renders must match. However, the server doesn’t have access to client data, and the store state differs between environments, unless it was not used before.

The fix is to run rendering with an empty store, and then reading the state specifically on client side. In this case, both server and browser use the same empty state during the first render. This is achieved by using a custom hook, useStore, which returns an empty initial state and loads the actual state on client inside a useEffect:

TypeScript
export function useStore<T, F>(
  store: (callback: (state: T) => unknown) => unknown,
  callback: (state: T) => F,
) {
  const result = store(callback) as F;
  const [data, setData] = useState<F | undefined>(undefined);

  useEffect(() => {
    setData(result);
  }, [result]);

  return data;
}

Now state can be retrieved like this:

TypeScript
import {uiStore} from '@/store/ui';
import {useStore} from '@/hooks/useStore';

const visiblePanels = useStore(uiStore, (state) => state.dashboard.visiblePanels); ✅ correct
const visiblePanels = uiStore((state) => state.dashboard.visiblePanels); // ❌ wrong!

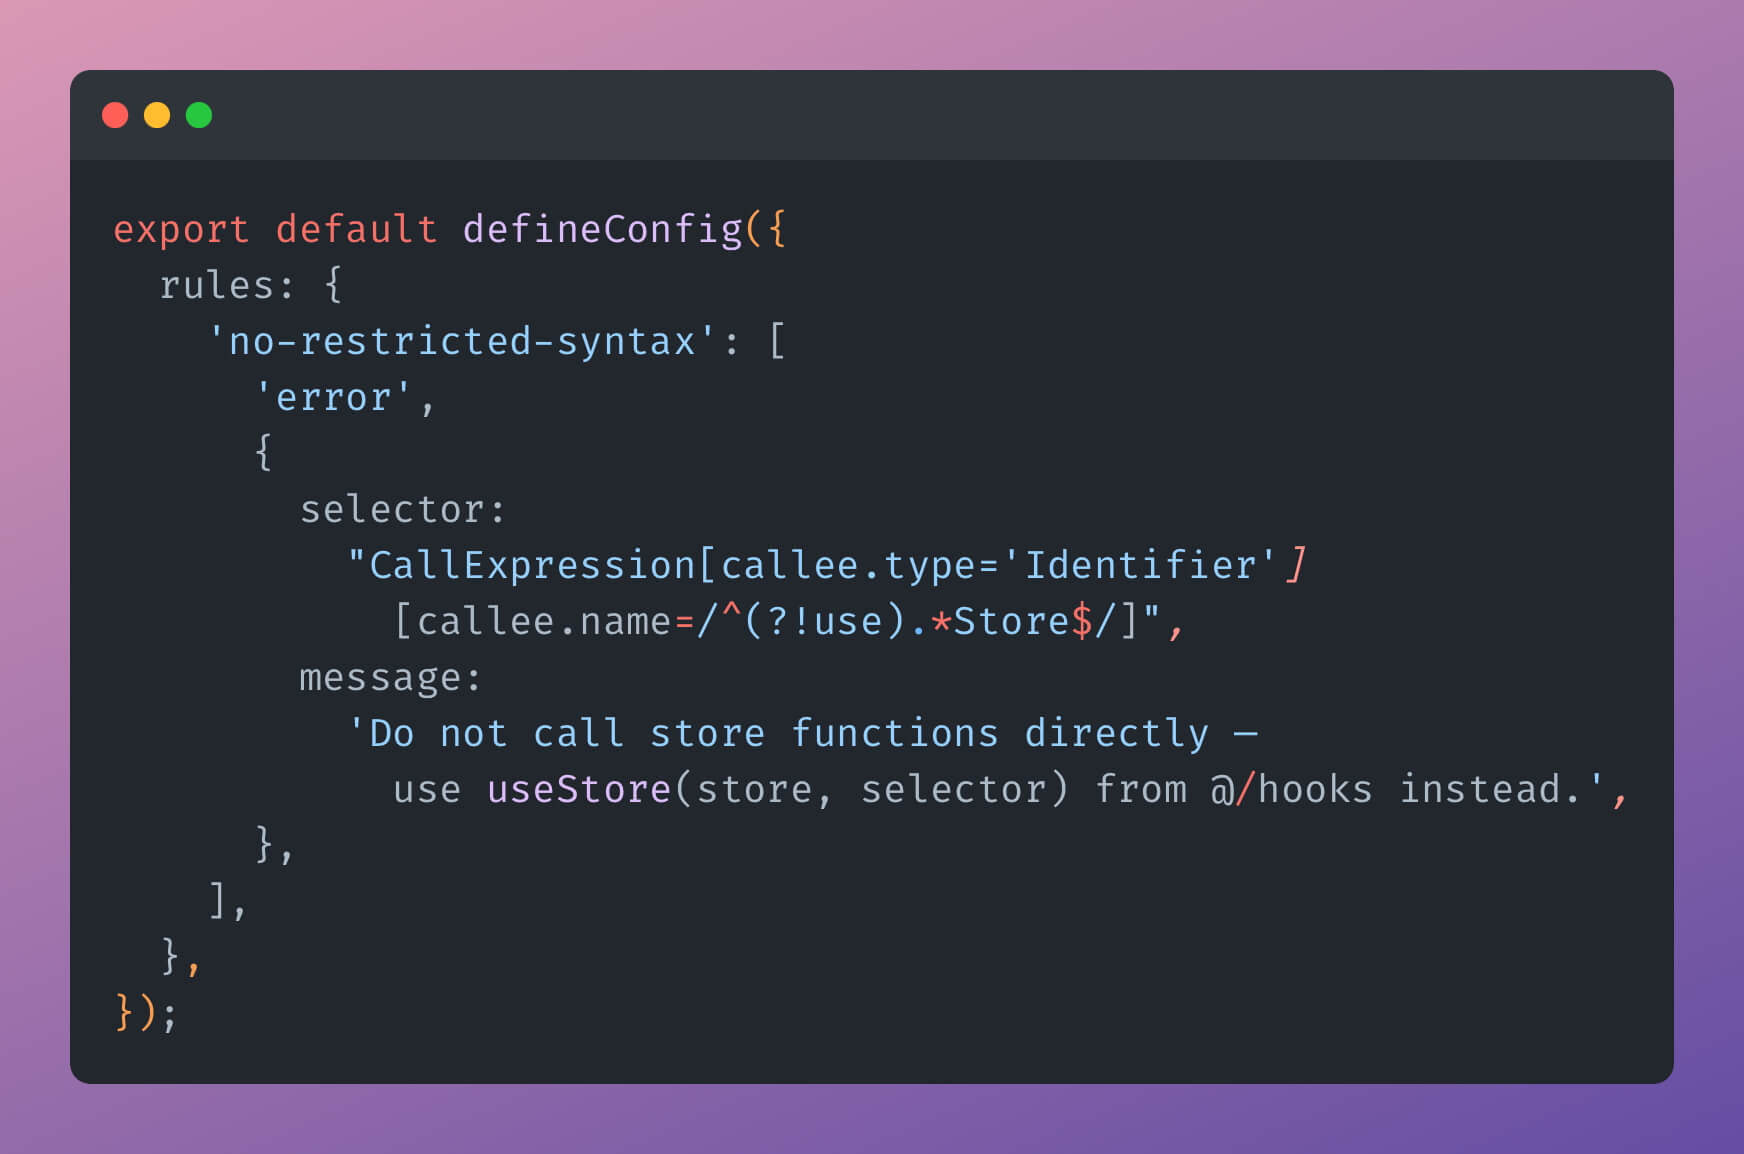
A problem is, nothing in this setup stops someone from using the wrong pattern. Moreover, the wrong way is the default in normal conditions, so any new developer or AI model are likely to use it. Here is where ESLint magic comes useful:

JavaScript
// eslint.config.mjs

export default defineConfig([
  // ...necessary plugins here...
  {
    rules: {
      'no-restricted-syntax': [
        'error',
        {
          selector: "CallExpression[callee.type='Identifier'][callee.name=/^(?!use).*Store$/]",
          message: 'Do not call store functions directly — use useStore(store, selector) from @/hooks instead.',
        },
      ],
    },
  },
]);

This way we tell ESLint to watch for any invocation of functions whose name ends with a Store, except for useStore — our custom hook. Direct usage will be flagged, so the new devs or models will be able to correct themselves. Surely, someone could write a store with a name different from useSomethingStore, but this naming format is common and default by docs, so we stay on a safe ground here.

With this approach, you can enforce any code style, variable usage rule, import restriction, or architectural constraint. Add them, use them, and may your code be impossible to write in a wrong way.
Shell Configs for Better Command History Search

In continuation of my previous post, How to View Past Terminal Commands: from Simple to Robust, I want to share shell config settings that help finding commands faster, while also looking for them much more further in the past.

Increase History Limits

First, HISTSIZE and HISTFILESIZE. These settings control how many past commands are stored in session memory and in the history file, respectively. Their defaults are 1000 commands for HISTSIZE and 2000 commands for HISTFILESIZE.

This is way too low for modern computers. If an average command length is 20 characters, then history settings limit us to only 40 KB in RAM and 80 KB on disk. Also there is no real benefit to storing fewer commands in memory: if a history entry exists, you should be able to access it using history command without additional tricks.

Let’s increase the limits:

Shell
# bash
HISTSIZE=50000
HISTFILESIZE=50000

# zsh
HISTSIZE=50000
SAVEHIST=50000

Remove Duplicates in Search

Now, let’s compress history entries. When I lookup commands using reverse search (Ctrl+R), I do not want to see duplicates like docker build. Let’s keep only the most recent copy of each command:

Shell
# bash
HISTCONTROL=ignoredups:erasedups

# zsh
setopt HIST_IGNORE_ALL_DUPS

Ignore Noise in History

When I use command search using arrow keys, I want to get quicker to useful commands, rather than wasting time and attention to common simple commands, such as ls or cd. Let’s prevent them from being saved at all:

Shell
# bash
HISTIGNORE="ls:cd:cd -:pwd:exit:clear"

# zsh
HIST_SKIP_PATTERN='^(cd|ls|pwd|clear|exit)(\s|$)'

Sync History Across Sessions

By default, history is saved only when a session closes. Let’s fix it: the terminal should append new commands and make them accessible in all open sessions immediately:

Shell
# bash
PROMPT_COMMAND='history -a; history -n'
shopt -s histappend

# zsh
setopt SHARE_HISTORY
setopt APPEND_HISTORY
setopt INC_APPEND_HISTORY

Final Setup

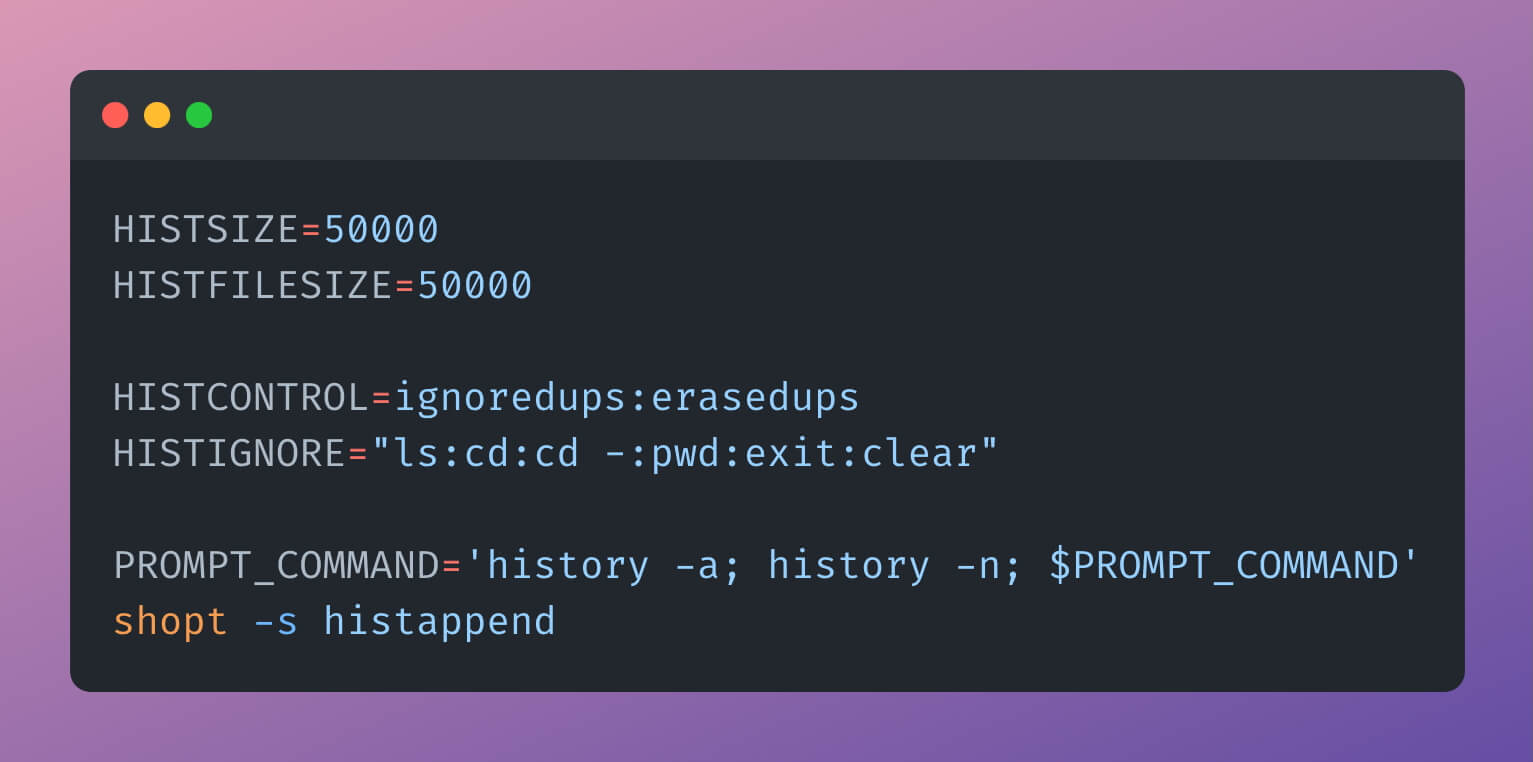
Now we are good! Below are full settings for both bash and zsh. Do not forget to run source ~/.bashrc or source ~/.zshrc after you make the changes.

Shell
# bash
HISTSIZE=50000
HISTFILESIZE=50000

HISTCONTROL=ignoredups:erasedups
HISTIGNORE="ls:cd:cd -:pwd:exit:clear"

PROMPT_COMMAND='history -a; history -n; $PROMPT_COMMAND'
shopt -s histappend
Shell
# zsh
HISTSIZE=50000
SAVEHIST=50000

setopt HIST_IGNORE_ALL_DUPS
HIST_SKIP_PATTERN='^(cd|ls|pwd|clear|exit)(\s|$)'

setopt APPEND_HISTORY
setopt SHARE_HISTORY
setopt INC_APPEND_HISTORY

Happy command searching!

P.S. Want Full Command Logging?

If you want to keep full command history, you are not constrained to inefficient search. You still can apply all the changes above, but additionally configure the shell to store full log in a separate file:

Shell
# bash
export LOGFILE=~/.full_bash_history.log
PROMPT_COMMAND='
  history -a
  history -n
  this_command=$(history 1 | sed "s/^[ ]*[0-9]*[ ]*//")
  echo "$(date "+%Y-%m-%d %H:%M:%S")  $this_command" >> "$LOGFILE"
'

# zsh
function preexec() {
  local LOGFILE=~/.full_zsh_history.log
  echo "$(date '+%Y-%m-%d %H:%M:%S')  $1" >> "$LOGFILE"
}

How to View Past Terminal Commands — from Simple to Robust

Suppose you want to re-run a shell command you used ten days ago. It was complex one; you do not remember exact flags and arguments, so it is going take a long time to reconstruct an exact text. What can you do?

1. The upwards arrow

Majority of devs know it. Press “up” to see the previous command, press “down” for the next command, press “Ctrl+C” to drop whatever is in the prompt and start fresh.

This approach works, but gets tedious when you need to find a line you used last month. Once more than ten or twenty commands have passed, scrolling becomes no better than writing a command from scratch.

2. Terminal history file

All the commands you enter into a terminal get stored in .bash_history file (or .zsh_history if you are on Mac) up to a certain limit. Thus, you can run:

Shell
cat ~/.bash_history # output all into the terminal
less ~/.bash_history # or use any text viewer
tail -n 20 ~/.bash_history # or observe only the most recent n lines
cat ~/.bash_history | grep whatever # to search for specific patterns

This method gives you full access to your history file and lets you see context around commands of interest, plus now you can search for them.

3. history command

Almost the same as using the history file directly: you get a list commands, but now it is numbered.

Shell
history -20 # show the last 20 commands
history -500 | grep ssh # search for a specific patter in a command
!780 # execute command with order number 780

But there is one important difference from direct usage of .bash_history:

  • history command uses the last HISTSIZE history entries (default 1000)
  • .bash_history file uses the last HISTFILESIZE entries (default 2000)
    It means that if your command was run a really long time ago, history may not find it. The line though, is still persisted, so direct inspection of .bash_history will help.

4. fc -l

This command behaves very similar to history, with an additional ability to display ranges of command numbers::

Shell
fc -l -20 # show the last 20 commands
fc -l 100 150 # show commands 100 to 150

5. Reverse-i-search

This is the most powerful approach. Press “Ctrl+R” to enter reverse incremental search mode. Initially you get no output; start writing any part of a command you remember, e. g. ssh or input.json or -n 10 — and you will see the first full command entry with that match!

From there, you can:

  • Press “Enter” to execute the command immediately
  • Use left/right arrow keys to move within a command to edit it, then press “Enter” to execute
  • Press “Ctrl+R” again to go to the next, older match
  • Press “Ctrl+S” to go to the previous, newer match (note a comment below)
  • Press up-down arrows to view to nearby entries in history around the match
  • Press “Ctrl+C” or “Ctrl+G” to exit the search

On many systems “Ctrl+S” shortcut will not work, as it is prioritized to pause terminal output (if that happens to you, press “Ctrl+Q” to resume). To make it work for reverse-i-search, add stty -ixon to your shell config. This incantation disables terminal flow control with “Ctrl+S” / “Ctrl+Q” shortcuts:

Shell
echo "stty -ixon" >> ~/.bashrc
source ~/.bashrc

Happy command line manipulation!

💡 This post has a second part: Shell Configs for Better Command History Search

The Very Roots of Object-Oriented Programming

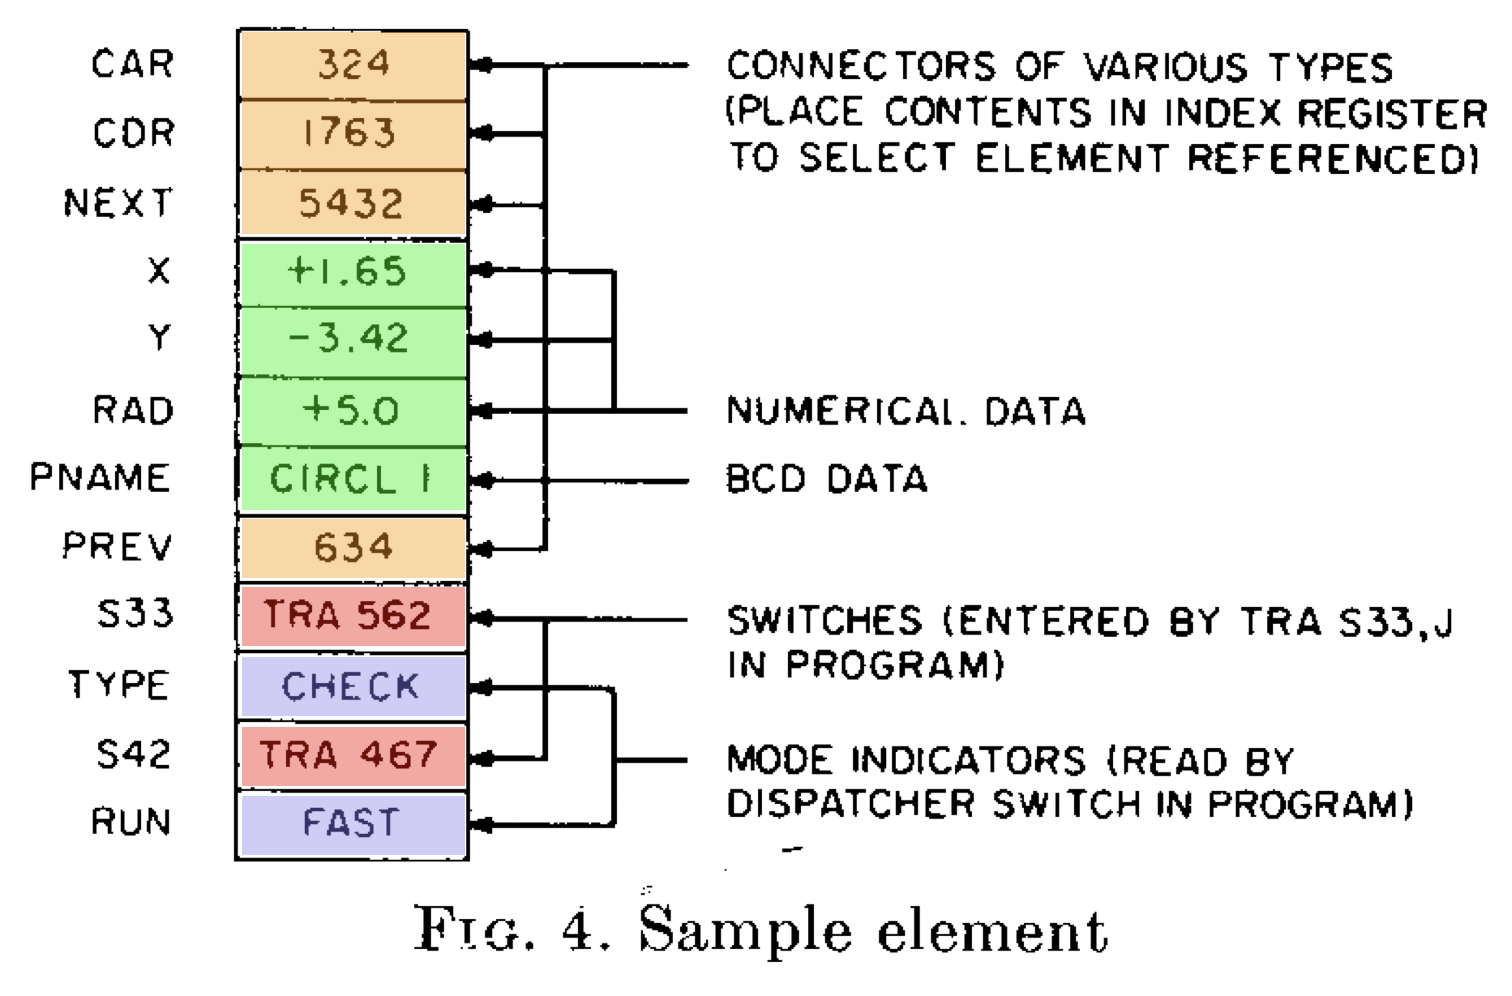
An image below is the first historical mention of something resembling objects we use today in OOP.

An ancestor of all modern objects — plex. Rectangles represent data in memory. Yellow ones are pointers to other objects, green rectangles hold actual values, red rectangles are pointers to functions, and blue rectangles are flags that control program execution flow.

The author is Douglas T. Ross from MIT, who published this concept in a paper A Generalized Technique for Symbol Manipulation and Numerical Calculation in 1960! He called it a plex, a shorter form of plexus, meaning “an interwoven combination of parts in a structure; a network”.

This solution was intended to solve problems for which commonly used linked list or tree structures were not sufficient enough. Each plex could hold both data and an arbitrary number of pointers, allowing it to represent complex object relationships — essentially, a network of interconnected elements. Pointers do not only point to other plexi, they could also point to functions. And, as these are not actual functions but pointers (which can potentially be changed during runtime), this means an invention of virtual functions as well. A truly fascinating stuff!

I’ve learned this bit from a great talk of Casey Muratori at the Better Software conference in which he digs into the history of OOP in C++. I highly recommend watching it in full.

Useful Commands to Debug DNS Issues and Redirection Loops (Ubuntu, Apache, Letsencrypt)

Recently I decided to add a blog to my personal website. Now I can regularly share thoughts with everyone! The blog resides at https://mishurovsky.com/blog/, while the main page remains at https://mishurovsky.com.

The path to a working solution, however, was not easy. My website is a Next.js application hosted on Vercel, while the blog engine I chose is a PHP application requiring a separate Linux server with Apache and MariaDB. My initial intent was to lead all traffic through a self-hosted reverse proxy, which would direct /blog requests to the blog engine, and all other requests to the Vercel page. I did not manage to make it work, so I ended up hosting both PHP and Next.js apps from my own server.

But that wasn’t the end of the story. After migration, HTTP connection was OK, but whenever I tried to switch to HTTPS, the response was still served by Vercel, even though I deleted both my domain and project from there! It was not just a failing request, but a redirection loop, 308 to mishurovsky.com again and again and again. I spent two days debugging configs and waiting for DNS caches to clear.

Long story short, the problem was in my use of Letsencrypt: I launched it as

Shell
certbot --apache ...# instead of certbot certonly --apache ...

, and Certbot created a separate HTTPS virtual host that reused an old configuration pointing to Vercel’s upstream. Apache prioritized this config over mine, causing a persistent redirect loop.

Helpful Commands to Debug DNS Problems and Redirection Loops

During this weekend journey, I discovered a lot of valuable commands to debug connectivity problems, which I want to share. Hopefully, these will help you, my reader, or me myself in some future.

1. Verbose cURL

Shell
curl -v https://example.com

Connect to a website and get a verbose response. Helps to see HTTP response codes and SSL connectivity status.

2. cURL with redirects

Shell
curl -I -L https://example.com

Connect to a website and get only headers in response + follow redirects. I used this countless times to examine if redirect loops persist.

3. Get site IP

Shell
dig +short example.com

Get an ip for a website. Useful when checking if a website is indeed hosted from a rented server.

4. Show all Letsencrypt certificates

Shell
certbot certificates

List all Letsencrypt certificates on a server with their domains, expiration dates, and paths to private and public keys.

5. Review Apache config

Shell
apache2ctl -S

All the main Apache config details: virtual hosts and structure. The most interesting part is error section in the beginning of the output — this is where I found a reference to an additional config from Letsencrypt.

6. Examine Port Usage

Shell
ss -tuln | grep ':443'
lsof -i :443

List all listening sockets (TCP/UDP), showing if port 443 is open. Then get a list of all process on port 443 (HTTPS).

7. Flush DNS Cache

Finally, Mac OS specific:

Shell
sudo dscacheutil -flushcache
sudo killall -HUP mDNSResponder

These two commands flush DNS cache on modern Macs, so DNS could be tested after updates. Requires to quit and re-start a browser after execution.